Thursday, March 17, 2011

Wonderful World of Baking Soda

 
The humble baking soda is humble no more. The uses for baking soda abound. from babies to batteries, gardening to cooking and personal care to pet care, baking soda uses continue to grow with each homemaker’s discovery. Here are the most common and the most helpful of said ways to use baking soda arranged in alphabetical order, just so you can have quick reference.

Baby Care


  • Instead of using store-bought detergents, combine baking soda with hot water to thoroughly clean and disinfect baby bottles.


  • Diaper Rash:For diaper rash irritations, mix 2 tablespoons of baking soda in baby’s lukewarm bath water.


  • Your baby will benefit from the eco-friendly ways with which you take care of him/her. white bathroom

    Bathroom


  • Often, bathrooms are the bane of a mother’s cleaning schedule. With baking soda, you can sprinkle good amounts on sinks, showers and tubs before scrubbing them.


  • On the toilet, add one cup into the water and leave for an hour before flushing, which will simultaneously clean and deodorize it.


  • Even your shower curtains will be cleaner once soaked in water with baking soda!

    Clothing


  • Baking soda has deodorizing properties ideal for clothes with sweat, smoke and spit-ups on them.


  • You can either place the baking soda directly into the spit-up of the baby to counteract the smell in a quick fashion or introduce clothing that is sweat-drenched/smoke-tainted from headbands to socks in a water-baking soda solution about an hour before washing them.


  • Even your malodorous shoes will benefit from baking soda. Just place a small pouch of baking soda into the shoe to remove the odors.

    Cooking


  • And of course, uses for baking soda center on cooking.


  • However,the uses for baking soda extends beyond making your cupcakes and omelets fluffier!


  • You can sprinkle baking soda on tomato-based foods so as to lessen their acid content, which is especially beneficial for people suffering from hyperacidity.


  • Fish and chicken can be made easier and yummier to prepare with baking soda, too.


  • When dressing chicken, combine one teaspoon of baking soda into the water to allow feathers to come easily.


  • For raw fish fillets, marinating them in baking soda solution for about an hour ought to remove the fishy smell.


  • And if you are entertaining guests, mix in a small pinch of baking soda into a gallon of iced tea to take out the tannins and to prevent cloudiness. Your guests will even notice the difference albeit in a positive way!

    First Aid

    baking soda uses


  • Some interesting uses for baking soda is to alleviate the pain and itchiness associated with bee stings and bug bites, sunburns and rashes, and even poison ivy contact.


  • Mix in baking soda and water to make a paste and apply directly into the affected areas.


  • Sufferers of chickenpox and measles will find much-needed relief from baking soda poured into bathwater.


  • For heartburn and acid indigestion, combining ½ teaspoon of baking soda and ½ glass of water ought to relieve pain.


  • However, be careful using this baking soda mixture in people with high calcium intake as it can lead to side effects like kidney stones.

    Garage


  • Baking soda uses even extend to the hard-to-clean garage!


  • When car batteries spill over, neutralize its acid with handfuls of baking soda so as to prevent severe accidents.


  • And if your car battery has grease and grime in it, remove them by using a soft brush and a baking soda paste.


  • Instead of using expensive car cleaners, make a baking soda paste to polish stainless steel and chrome as well as mask the little scuffs on the bumper.


  • Also, wipe baking soda directly into the windshield to repel rain.

    Gardening


  • Go beyond the kitchen, and move into the garden for more uses for baking soda.


  • Keep away fungi, black spots and mildew from your precious plants by applying baking soda mixed with soap and horticultural oil directly into the affected leaves.


  • For your precious roses, spray them on a weekly basis with a mixture composed of one teaspoon baking soda, one galloon of water and just a few drops of dishwashing soap.

    Grills


  • Baking soda is a dirt-buster!


  • Use it to clean coal-blackened grills, which will help you avoid using chemical products and thereby adding them to your food the next time you have a barbecue. And keep a box of baking soda handy when you do grill food.


  • It is also a great fire-stopper, with just a handful effective in putting out fires caused by grease, wood, fuel and electricity.

    Kitchen


  • Arguably, the kitchen has more uses for baking soda than any other part of the house.


  • For delicate china and inexpensive plastic, sprinkle soda on food stains and wipe away with damp paper towels.


  • For ovens, combine four tablespoons baking soda and a quart of lukewarm water to scrub its inside.


  • Or you can just apply baking soda directly to cutting boards and countertops to take off the smells of food as well as clean it.


  • Mix with salt for better cleaning and deodorizing.


  • Clogged drains will go away when four tablespoons of baking soda are placed in them every week, which should then be flushed with hot water to clean the insides.


  • Or you can freshen up the kitchen by combining your perfumed bath salts with baking soda, placing the mixture in sachet bags and then putting them in strategic places.

    Personal Care


  • Don’t turn up your nose at the uses for baking soda in your personal care routine. Use it as an effective skin exfoliant by mixing one of part water to three parts of baking soda. Apply on your face using either your fingertips or a soft washcloth in gentle, circular motions and rinse thoroughly. You will notice the natural glow in just a few days! bath salts


  • Transfer such natural glow for a healthy mane of hair. Just mix a pinch of baking soda into your favorite shampoo and conditioner, which should strip undesirable chemicals from your hair for a healthier look.


  • For better oral care, soak your retainers, dentures and mouth guards in a baking soda solution of a glass of warm water mixed with 2 teaspoons of baking soda. These oral appliances will come out cleaner and better smelling, too. So, the next time you want affordable and eco-friendly solutions around the house, think of these use for baking soda!


  • Snicker Salad

    Wednesday, March 16, 2011

    Strawberry Jello Pretzel Salad


    Layer 1
    • 2 1/2 cups crushed pretzels
    • 3/4 cup melted butter
    • 3 Tbsp sugar
    Mix together and press into bottom of 9x13 pan. Bake at 350 for 10 minutes. Let cool.

    Layer 2
    • 8 oz cream cheese
    • 1 cup sugar
    • 8 oz Cool Whip
    Cream together cream cheese and sugar then fold in Cool Whip. Spread on cooled pretzels. Make SURE to seal-don't leave any holes that Jello will leak through.

    Layer 3
    • 1 large pkg Jello (strawberry or raspberry)
    • 16-18 oz frozen berries (rasp, strawb, black, blue)
    Stir Jello into 1 1/2 cups boiling water and dissolve. Add 6 ice cubes (8 if berries aren't frozen). Dissolve ice cubes. Add frozen berries. Stir. Pour over the other layers. Chill in fridge until Jello is completely set.

    Fresh Peach Dessert


    If there is any possible way to get your hands on some fresh peaches...RUN. GET THEM. AND MAKE THIS ASAP!


    Fresh Peach Dessert
    2/3 cup powdered sugar
    3/4-1 cup butter
    2 pkg. graham crackers; crushed
    12-14 medium peaches; peeled & sliced  or if you must 3 cans
    1 can sweetened condensed milk
    1/4 cup lemon juice
    1 pt. whipping cream

    Mix cracker crumbs, powdered sugar, & butter. Press into the bottom of a glass 9 x 13 pan. Reserve some of the crust to sprinkle on top. Whip cream and add a little vanilla and powdered sugar until set. Mix the sweetened condensed milk with lemon juice. Then place the peaches on the crust and pour the milk/lemon mixture on top. Spread the fresh cream on top and sprinkle with remaining crust.

    *This is so light and fresh, but you have to share it or half it because it is best if enjoyed in the first 24 hours!

    Tuesday, March 15, 2011

    Homemade Laundry Detergent

    I was low on store bought laundry detergent and I bought it only because it was 1.20 with coupons and a great sale at Walgreens a couple months ago. I bought like 5 bottles. I usually make our laundry detergent but why with that sale. I broke down and made our usual soap but this time We did add the essential oils to it, orange scent, wow it's awesome!! If you need the recipe again here it is. I adapted it from the Duggar's recipe. Cost is only 3.15 to make 5 gallons, seriously it's too cheap not to make it.


    Homemade Liquid Laundry Soap- Front or top load machine- best value

    4 Cups - hot tap water
    1 Fels-Naptha soap bar
    1 Cup - Arm & Hammer Super Washing Soda*
    ½ Cup Borax

    - Grate bar of soap and add to saucepan with water. Stir continually over medium-low heat until soap dissolves and is melted.

    -Fill a 5 gallon bucket half full of hot tap water. Add melted soap, washing soda and Borax. Stir well until all powder is dissolved. Fill bucket to top with more hot water. Stir, cover and let sit overnight to thicken.

    -Stir and fill a used, clean, laundry soap dispenser half full with soap and then fill rest of way with water. Shake before each use. (will gel)

    -Optional: You can add 10-15 drops of essential oil per 2 gallons. Add once soap has cooled. Ideas: lavender, rosemary, tea tree oil.

    -Yield: Liquid soap recipe makes 10 gallons.

    -Top Load Machine- 5/8 Cup per load (Approx. 180 loads)

    -Front Load Machines- ¼ Cup per load (Approx. 640 loads)

    Awesome Popcorn Cake

    Back when I had a lot more time on my hands I watched the Food Network channel. I love Emeril. He made this wonderful popcorn cake, so easy. You simply airpop popcorn, then melt two sticks of butter, 1 (16 oz) bag marshmallows together on the stove top. Add the marshmallow mixture to the popcorn (20 cups popped) . Add a bag of any candy, we like skittels, or M and M's  work great. Press into a greased bundt pan, cool and serve. Sooo yummy and great for kids to make too. Great way to use up some popcorn in storage.

    Thanks Emeril!!

    Sunday, March 13, 2011

    Inspired Coincidences: The Lord's Law of Health

    Inspired Coincidences: The Lord's Law of Health: " I teach the 2nd Sunday of every month at Church. This month, the lesson is on The Lord's Law of Health (also known as The Word of Wisd..."
    ( You must check out this wonderful lesson by Inspired Coincidences, pure sweetness!!)

    Homemade Fabric Softener

    You can make your own liquid fabric softener. There are several versions to choose from–most being a combination of baking soda, vinegar, and/or hair conditioner. I am no chemist, but  take note of a comment about mixing baking soda and vinegar to use as a fabric softener. The commenter said that once this stuff bubbles up (yes, this is the volcano recipe from the school science fair) it chemically changes to a salt. So you end up with salty water.
    Hmm.
    Yet, many people insist that the combination works. Others say use baking soda alone. Or vinegar alone. Or vinegar plus hair conditioner.

    Here is one common combination:
    Pour a cup of baking soda into a gallon container, followed by a cup of water. Add 6 cups of vinegar (observe bubbling with amazement) and then pour in 6 more cups of water. Add 10 or so drops of essential oils if you like the smell, but be aware the vinegar scent won’t remain on your clothes, so you don’t need to worry about covering that up. Shake before each use–a cup or so per load.
    If you use hair conditioner, for goodness sake, buy a big jug of something cheap–something that smells good. Your clothes will not judge you for not using salon conditioner.
    Vinegar also will remove soap residue from clothes, so you’ll not only get softening, but brightening as well, as the dinge of soap is removed.

    Is “dinge” a word?
    And, if you still notice static cling, try crumpling up a piece of aluminum foil and throwing it in the dryer. Really.

    Lastly, remember that Grandma would say, goodness, just hang things on the line. Nothing beats the luxury of line-dried, sun-scented sheets

    Saturday, March 12, 2011

    Rotating Your Food Storage

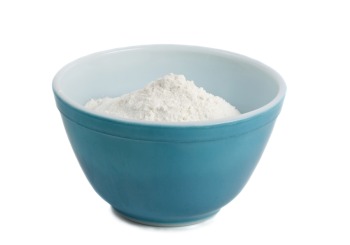
    Sister Julie Beck, the General Relief Society President, asked several bishops what skills the sisters in their wards needed most to be self-reliant. Their answer: living within a budget and cooking. Rotating and using your food storage can help you to be more self-reliant. Why is it important to rotate your food storage?
    1. Prevents throwing away unused, expired food, which saves you money.
    2. Allows you and your family to get accustomed to eating stored food, essential in effectively dealing with emergency situation.
    3. Eating your long-term storage is healthy. Most food storage items are lower in fat and higher in nutrients than most convenience foods.
    4. Because these high-fiber food will be upsetting to the digestive system if you suddenly begin to eat them, it is important to start incorporating them into your diet now.
    5. By already knowing how to use your food storage, it will help to relieve a lot of stress in times of emergency.
    6. If you will eat food storage meals two days out of the week you can have a whole year’s supply rotated in just three and a half years.
    Pantry
    How can you remember to use your food storage?
    1. Keep a permanent marker in the same place where you store your food and then every time you bring home a new package or can of food, just date it. If the item has an expiration
      date already on it, you might want to circle it. I have also written the date on the item at the time of purchase.
    2. Keep small amounts of your food storage in the kitchen. The more you see these items the more often you will use them.
    3. Find recipes that sound interesting using food storage items. The Internet is a great resource. Many of the cooking websites allow you to enter either the recipe you are looking for and/or the ingredient(s) you have on hand. I like the websites where users rate the recipe and give comments. My favorite site is allrecipes.com. Also, BYU TV and byubroadcasting.org have a wonderful program called Living Essentials that has many segments on preparedness. Three of them are on rotating and using your long-term storage. You can also print the transcripts.
    4. Incorporate food storage items into your favorite recipes.

    Cheesecake Bars


    Cheesecake Bars

    Base:
    1/3 cup butter
    1/3 cup firmly packed brown sugar
    1 cup all-purpose flour
    1/2 cup finely chopped walnuts or pecans

    Filling:
    1/4 cup sugar
    8 oz. cream cheese, softened (Low-fat cream cheese is fine in my opinion. But if you don't usually like it, stick with the regular)
    1/2 tsp vanilla
    2 Tbsp milk
    1 Tbsp lemon juice
    1 egg

    Heat oven to 350. In a small bowl, cream butter and brown sugar until light and fluffy. Lightly spoon flour into measuring cup; level off. Combine flour and walnuts or pecans with creamed mixture. Reserve 1 cup for topping. Press remainder into bottom of ungreased 8" or 9" square pan. Bake for 9-11 minutes or until lightly browned.

    In a small bowl, blend sugar and cream cheese until smooth (if using fat-free cream cheese, mixture will be kind of lumpy, but it will cook up just fine). Add milk, lemon juice, vanilla, and egg. Beat well. Spread over baked crust. Sprinkle with reserved crumb mixture. Bake at 350 for 23-27 minutes or until lightly browned. Cool. Cut into bars. Store in refrigerator. Makes 24 small bars.

    Whole Wheat Tortillas

    *Use a nonstick mat when rolling out
    *Roll them out very thin!
    *Do not overcook!!

    Other than that they are easy and no fail!!


    Whole Wheat Flour Tortillas
    submitted by Melanie

    3 cups whole
    1 tsp salt
    1 cup hot water
    1/3 cup oil (I used canola)
    Mix all ingredients thoroughly in mixer. Remove from mixing bowl and knead on countertop until smooth (add a little white flour if the dough is too sticky). Divide the dough into 12 balls, and let rest (covered) for 15 minutes. Roll each ball into a very think circle. Heat a heavy skillet (ungreased) to medium high heat. Cook tortillas until brown flecks appear, about 30 seconds each side. (Adjust heat accordingly) Use immediately, or wrap in plastic or place in a airtight container to refrigerate or freeze. To warm, wrap in damp paper towels and microwave 15-20 seconds.

    Thursday, March 10, 2011

    Homemade Peanut Butter

    Homemade Peanut Butter
    You will need:
    • 1 1/2 cups peanuts. (I used roasted and salted)
    • 1/2 teaspoon olive oil (may need slightly more or less)
    • 1 tablespoon raw honey
    • Salt to taste (if your nuts aren’t already salted)

    The players. (Do you like my cute little liquid measuring glass? It’s not a shot glass. Promise.) 
    Thoroughly process the peanuts in a food processor until finely chopped.
    While the processor is running, stream in a bit of olive oil. (I did not use this whole glass, just a bit) You may have to turn off the processor for a minute, removed the lid and scrap the bottom of the bowl in order to make sure everything is incorporated well enough (at least that is what I had to do with mine).
    Next, stream in the honey in the same manner.
    And you’re done! It has a slightly chunky consistency, which I prefer. I also like to store mine in the fridge. It won’t last for years on the shelf like the commercial peanut butters do, but I doubt it will have a chance to be around for that long anyway!

    Sunday, March 6, 2011

    20 Ways To Save Money On Laundry

    When you are living on a tight budget like my family is you have to find ways to save $$ in every department! Here are some ideas for saving money on doing laundry:
    1. Try to buy clothes that don’t have to be dry cleaned.
    2. Remove and hang up your clothes that need to be dry cleaned as soon as you get home to help keep them in good shape, and to prolong another trip to the cleaners.
    3. Search out a discount dry cleaner. There are many $1.50-$2.50 cleaners who are just as good as the more expensive chains.
    4. If you are able, put up a clothes line and hang your clothes out to dry when you can.
    5. Do all of your laundry in one day. If you are using the dryer, it will stay warm between loads and keep your overall heating cost down.
    6. Wash all, but the most soiled clothes (use warm water for these), in cold water, followed with a cold rinse.
    7. Use a little less than the recommended amount of detergent for each load. Your clothes will come out just as clean.
    8. A little maintenance for your washing machine will add years to its life. To unclog hoses, and clean out all of the build up, fill the machine with hot water, pour in a gallon of distilled white vinegar. Allow it to run through an entire cycle.
    9. If you use dryer sheets, tear them in half before throwing them in. They will work just as well.
    10. Save the dryer sheets after they’ve been used. They make great dusting cloths for TV’s and computer screens. The anti-static properties will also help to repel more dust from attracting to them.
    11. Press dress suits with a damp cloth between the clothing and the iron. Unless dirty, you only need to send suits to the dry cleaners twice a year to preserve the fibers.
    12. Spray ties with fabric protector to avoid frequent dry-cleaning.
    13. Wear you clothes a couple times before you wash them. Unless they are soiled they don’t need to be cleaned after every wear.
    14. Make your own Laundry Detergent 
    15. Run the washer through a second spin cycle. It will get more of the water out and cut down on drying time. It’s cheaper to do this, than run the dryer longer.
    16. Make your own dryer sheets. (This is a tip I found on another website): Save big bucks every year by making your own dryer sheets. Pour liquid fabric softener into a clean spray bottle, and spray 4-6 times onto a designated rag. Put into your dryer with clothes and tumble as usual. Wash the rag every once in a while to remove buildup. A small refill carton of concentrated softener lasts about 1 1/2 years.
    17. Use white vinegar in your laundry’s rinse cycle instead of fabric softener. About 1/4 or 1/2 cup will do a good job of keeping things soft and static free with no “smell”.
    18. For front loading washing machines: use half of the recommended liquid detergent. It will work just as well and save you twice as much!
    19. A front loading washer typically uses 1/3 to 2/3 less water. Try to get energy star appliances also. They will save on your overall energy bill. You don’t have to buy them new either. If you are in the market for a new washer or dryer, look in your local classifieds, or on Craigslist, there are usually lots to choose from.
    20. Purchase Dryer Balls: Supposedly they cut down on drying time, saving energy and money! I haven’t used these yet, but I’d like to try them out. Anybody out there have any comments about these?
    Well, I hope this is helpful to you! If anyone has any more suggestions, please let me know!

    Use it UP, Wear it OUT, Make it DO or Do WITHOUT

    Two key elements to being truly frugal are:
    Make it last longer & Use it all up
    Use your things sparingly. See how you can stretch them to make them last even longer.
    Dilute shampoo and conditioner with water. It’ll still work just as good and last twice as long! (Don’t try this on the cheapest brands though, it doesn’t work well on them.)
    Use less than the recommended amount of detergent in the dishwasher and washing machine.
    Only use a pea size amount (like instructed) of toothpaste instead of a whole glob!
    Lightly dab on moisturizer instead of saturating your face with it.
    And use it all up, completely.
    For example: toothpaste is pretty expensive (in my frugal mind). So when we get low on toothpaste, and the tube has been squeezed as flat as it possibly can be squeezed, I don’t stop there. Realizing that there is probably a little more paste still inside, I cut the tube down the side and… BEHOLD! There’s always a bunch of toothpaste still sticking around inside. So, I just scrape some off onto the toothbrush, and put the cut tube into a Ziploc baggie to keep it fresh. It usually lasts for another week and a half!
    What else can you squeeze the last drop out of?
    Swish water around in containers like shampoo/conditioner, liquid laundry detergent, dish detergent and such. Shake up your empty chocolate syrup container with a little milk, to get the very last bit of chocolate out before you toss the bottle. Cut open tubes of products, and be amazed at how much more stuff is hiding inside!
    So, before you throw something away, see if there might be at least one more usage out of it. The savings really add up!

    Homemade Sweetened Condensed Milk for Pennies

    With a can of Eagle Brand Sweetened Condensed Milk going for around $2.50-$3.50 nowadays, you might want to consider this money saving substitute! Here is an easy way to make your own sweetened condensed milk, so that you can stretch your grocery budget a little farther!
    • 3/4 cup sugar
    • 1/2 cup water
    • 1 1/8 cup powdered milk
    Combine all ingredients in saucepan and heat over medium heat until boiling, stirring constantly. Reduce heat to low and cook until thickened, approx. 15-20 min. Continue stirring to avoid burning. A double-boiler may also be used to avoid burning.
    Here is a “no cook” recipe for Eagle Brand milk substitute that I found that you might like to try as well:
    1/2 C. hot water
    1 C. Powdered Milk
    1 C. Sugar
    1 T. Butter
    Blend in blender very well. Can be stored in the refrigerator or frozen.
    There are actually several recipes for this out there, some using evaporated milk instead of powdered. If none of mine work for you, keep looking! You’ll never have to buy one of those expensive little cans again!

    Toilet Bowl Cleaner

    Homemade Toilet Bowl Cleaner

    toilet-cleaner-medium
    Need a recipe  for cleaning your toilet bowl using safe, non-toxic ingredients?
    Baking Soda and Vinegar: Sprinkle some baking soda (about 1/4-1/2 c.) around the toilet bowl, then spray it with white vinegar in a spray bottle (uses less than just pouring it on). Scrub with toilet brush and flush to rinse.
    A cheap and easy way to clean, deodorize and disinfect your toilet bowl!
    Borax and Lemon Juice: In a container mix about 1/2 c. borax to 1/4 c. lemon juice (more or less as needed) to make a paste. Flush the toilet to get sides of bowl wet. Then, using a glove (or I like to use an old sock), rub the paste around the inside of the toilet bowl, especially glopping it over stains. Leave on for at least 2 hours (or overnight if possible), then scrub off with brush.
    *I do this after a first cleaning with the baking soda/vinegar mix, so the bowl isn’t too grimy. I use this for slightly tougher stains, plus I like the lingering smell of the lemon juice!

    Saturday, March 5, 2011

    Wonderful Wheat Bread

    Simple Wheat Bread
    Ingredients


    3 cups warm water (110 degrees F/45 degrees C)
    2 (.25 ounce) packages active dry yeast
    1/3 cup honey
    5 cups bread flour
    3 tablespoons butter, melted
    1/3 cup honey
    1 tablespoon salt
    3 1/2 cups whole wheat flour
    2 tablespoons butter, melted

    Directions

    In a large bowl, mix warm water, yeast, and 1/3 cup honey. Add 5 cups white bread flour, and stir to combine. Let set for 30 minutes, or until big and bubbly.

    Mix in 3 tablespoons melted butter, 1/3 cup honey, and salt. Stir in 2 cups whole wheat flour. Flour a flat surface and knead with whole wheat flour until not real sticky - just pulling away from the counter, but still sticky to touch. This may take an additional 2 to 4 cups of whole wheat flour. Place in a greased bowl, turning once to coat the surface of the dough. Cover with a dishtowel. Let rise in a warm place until doubled.

    Punch down, and divide into 3 loaves. Place in greased 9 x 5 inch loaf pans, and allow to rise until dough has topped the pans by one inch.

    Bake at 350 degrees F (175 degrees C) for 25 to 30 minutes; do not overbake. Lightly brush the tops of loaves with 2 tablespoons melted butter or margarine when done to prevent crust from getting hard. Cool completely.

    Hint to cut rising time in half:  After clothes have come out of the dryer and the dryer's still hot, place the covered dough in the dryer & close the dryer door. Of course you don't turn the dryer on, but the heat from it causes the dough to rise faster.

    Potato Pearl Recipe

    Cooking with Food Storage: Potato Pearl Recipes

    I have a lot of potato pearls from the church's home storage center. My husband loves potato pearl mashed potatoes. Now I'm excited to find two recipes for things that I like using potato pearls. I thought you might enjoy them as well!

    Potato Pearl Bread
    5 c milk
    1/2 c shortening
    1/2 c sugar
    1/2 c potato pearls
    2 T salt
    2 T yeast
    9-11 c flour

    Microwave milk until hot. Place shortening, sugar, salt and potato pearls in a large bowl. Pour hot milk over shortening mixture and stir until potato pearls are dissolved. Cool. Add yeast. Mix in enough flour to form a soft dough, then knead 6 minutes. Cover and let rise. Form into loaves and place in four loaf pans. Let them rise. Bake at 350 degrees for 35 minutes.

    Potato Rolls
    Dissolve:
    2 pkg. yeast (5 tsp)
    1/4 c warm water
    2 c milk
    3/4 c sugar
    1/2 c shortening
    1/3 c potato pearls
    2 eggs
    2 tsp salt
    8 c flour (approximately)

    Dissolve yeast in warm water. Scald milk, sugar and shortening and set aside. Mix potato pearls with hot water to equal one cup. When milk mixture has cooled to lukewarm, mix with potato water, yeast, eggs and salt. Add about 8 cups flour. Knead until smooth and elastic. Raise until double. Punch down, roll out 1/2 inch thick. Cut in 3 to 3 1/2 inch circles. Fold in half, pinch edges together. Place on greased cookie sheet. Raise until double (approx. 45 minutes). Bake at 375 degrees for 10-15 minutes. Makes 3 1/2 dozen.

    Potato Cinnamon Rolls
    Roll out Potato Roll dough (see above) into a rectangle. Spread with butter. Sprinkle with brown sugar, cinnamon, raisins, nuts. Roll dough up into a roll and pinch the seam closed. Cut in 1 1/2 inch slices. Place in grease 9x13 pan and bake at 375 degrees for 10-15 minutes.

    Cookies and Cream Brownies

    Cookies-n-Cream Brownies

    1 box (1 lb. 2.3 oz) fudge brownie mix
    1/4 cup water
    2/3 cup canola oil
    2 large eggs
    1 cup crushed cream filled cookies (I prefer Oreos)
    Vanilla Frosting (recipe to follow)
    1/2 cup chopped cream filled cookies

    Preheat oven to 350 degrees.  Line a 9x13 inch pan with tin foil so that the sides hang over the edges.  Spray lightly with cooking spray.  Set aside.
    In a large bowl, combine the brownie mix, water, oil and eggs until well mixed.  Add the crushed cookie crumbs and stir to combine.  Spread the brownie batter in the prepared pan.  Bake 25 minutes or until toothpick inserted in center comes out with just some crumbs on it.  Cool completely.  Chill the brownies in the refrigerator for a couple hours (This helps made for really fudgy brownies and makes cutting easier.)

    To make the frosting, combine in bowl of electric mixer:
    2 cups powdered sugar
    1/2 stick (2 ounces) unsalted butter, softened
    pinch salt
    1 teaspoon vanilla extract
    2 tablespoons milk (add last and a little at a time while mixer is beating the other ingredients until desired consistency)
    Spread the frosting over the chilled brownies.  Chop up enough cookies to sprinkle over the brownies.  Cut in to desired sized brownies.
    *I prefer lining the baking pan with foil as the baked goods lift right out of the pan and never stick.