Adapted from Utah Preppers
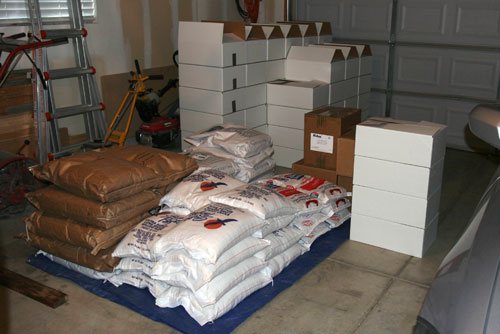
For Christmas this year, we decided to forgo gifts and add to our dry-pack food supply. With access to a dry-pack canner through the local unit of my Church, I decided the most cost effective and efficient route this time would be to buy in bulk and do the canning myself at home. I purchased all of the food and supplies from The Church of Jesus Christ of Latter-day Saints Home Storage Center in Sandy.
We were able to get everything we wanted except wheat which they were out of until the first of the year. I will be going back in a few weeks to finish off that part of the order. I did learn exactly how much will fit in a 4Runner, although I had more than the traditional blind-spot to worry about on the drive home. For this round, I canned rice, sugar, pinto beans, black beans, white beans, potato flakes, dry milk, dried onions, apple slices, and both quick and regular oats.
The nice thing about the Home Storage Centers is that they have everything you need to complete the project including the cans, lids, oxygen absorbers, and boxes. They even had a temporary clip that you can use on the bag that holds the oxygen absorbers since they cannot be exposed to the air for longer then ten minutes or so or they will go bad.
Dry-pack canning is really very simple—you fill the can up, drop in an oxygen absorber (except for sugar), put the lid on, seal it, and then label the can so you know what’s inside—but I learned a few things that helped me get more efficient after the first day. Instead of repeating each of those steps for each can, it is much easier to do thirty cans or so in a batch. Set up a long table next to where you have the canner mounted and then set up thirty or so empty cans. You can then open one of the bulk bags and pour across the cans filling them all in turn, without bending over or having to pick the bags up and setting them down again and again.

You’ll then want to tap the cans on the table good and hard several times to get the food to settle, topping off as needed until the can contains is much as possible. I learned that with most items, if I fill the can until the contents are heaped above the rim and to the point of overflowing, they will usually settle down nearly perfect, leaving just enough room for the oxygen absorber and the lid. A few of the lighter items like flour and milk really compact though and you’ll need a cup of some sort to scoop extra and top off the cans. For the items such as apple slices, onions, and potatoes that come in a box, I found scooping the contents out with a plastic pitcher to be the most effect method.
I didn’t bother with labels for the cans and boxes, even though you can get them for free with your purchase from the Home Storage Center; I simply wrote on the cans with a black Sharpie. I then loaded the cans into cardboard boxes that I also purchased there six at a time and labeled the box as well. Obviously the more hands you have the faster the work goes but it is something that can easily be done solo. The only real possible obstacle I can see for some would be lifting and transporting the twenty-five pound bags. If you can get your hands on a canner, I would definitely recommend this approach.
So much does this cost? Was it worth the effort to can it myself? Using the price sheet, let’s break it down.
Equipment436 cans @ $0.40/each = $136.08
436 lids @ $0.11/each = $35.64
436 oxygen absorber @ $0.07/each = $22.68
72 cardboard boxes @ $0.56/each = $33.04
Food
3 bags oats, regular @ $10.40/each = $31.20
3 bags oats, quick @ $10.40/each = $31.20
25 bags wheat @ $6.05/each = $151.25
15 bags rice @ $15.90/each = $238.50
12 bags sugar @ $10.50/each = $126.00
4 bags pinto beans @ $12.65/each = $50.60
5 bags pinto beans @ $14.35/each = $71.75
3 bags white beans @ $14.35/each = $43.05
3 bags potato flakes @ $28.05/each = $84.15
5 bags dry milk @ $44.45/each = $222.25
1 box dried onions @ $69.15/each = $69.15
1 box apple slices @ $64.95/each = $64.95
That’s $293.2 for supplies and $1184.05 for food and a combined total of $1477.25. We roughly purchased for 3.5 adults for one year. Let’s compare that with off the shelf options. Emergency Essentials has three packages: Ultimate, Premium, and Traditional costing $2,399.95, $1,549.95, and $799.95 respectively for a single adult year supply. While the each of these contains significantly more variety (dehydrated fruits and vegatables, drink mixes, pancake mix, etc), you can see that there is significant savings in doing the packaging yourself. Even if we go with Emergency Essentials basic package, it works out to be $11.11 per can whereas mine was $3.30 per can. How much did you spend on Christmas this year? Sure, I’d rather be eating the gourmet meal found in Emergency Essential’s Ultimate package, but this does show that there is no excuse for not having a year’s supply.
No comments:
Post a Comment