Ok, I've been known to re-purpose things before like when I made a tote bag out of business cards for a friend. Or when I made a much needed container for my bathroom out of Tampax box - (don't worry it was covered and changed enough that no one knew what it was. Hubby would have died if it was recognizable). I've made candy dishes from gladware packaging. (I'll show that one soon - stay tuned!) You get the idea. Anyway, it's just the way my mind works, I see something for what it is but then my mind switches gears and starts designing what it could be.
That's what happened with my project for today. It actually came out of need. I don't like stacking my cans. They never stay orderly. They always fall over. Or they get pushed to the back of the cupboard and I forget what I have and it BUGS me. So, I made this.
Yes, I know you can by self-rotating Can Stackers for food storage but the small ones are $32 and frankly, I'd rather make my own and so that's what I did. I had everything on hand except for the soda so the out-of-pocket expense was $3.50. Here's how I did it....

1- First, I needed an empty fridge pack of soda. My kids were thrilled to find rootbeer in the fridge. I bought it specifically for the packaging - is that wrong? Not really, just backwards, I guess.

2- On the back end of the container I cut out a space that is large enough to put a can of soup in.

3- I grabbed some decorative paper (I used about 3 sheets of 12x12 scrapbook paper) and folded it into place to cover the box. I put everything in place, creased my edges and cut out my opening to fit the one I had cut in step 2. Then I just took some Mod Podge and glued all the paper into place. I did the back end of the box first and let it completely dry.
4- Once the back end was done drying, I grabbed another piece of paper and repeated the steps until the front part is covered. And, just to make it more decorative, I used a coordinating paper for the front.
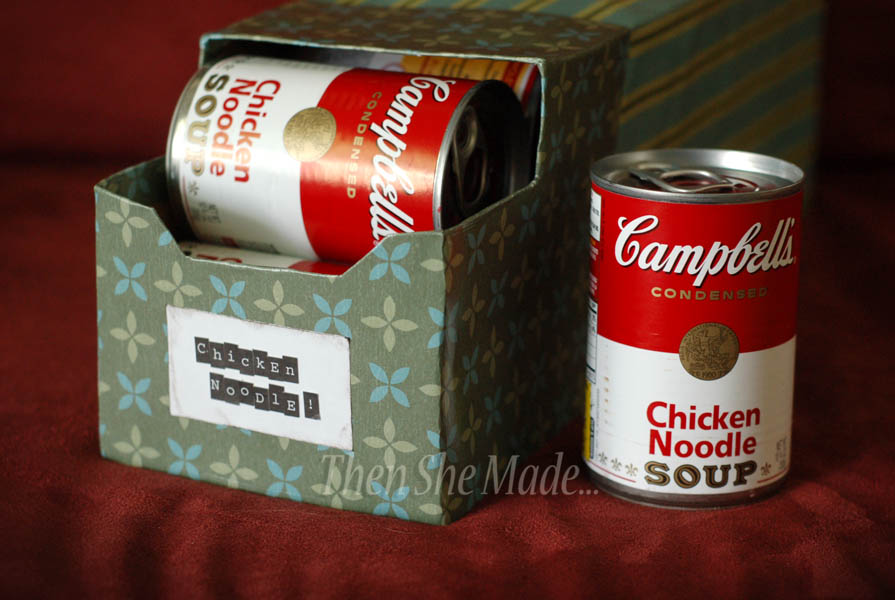
5- Then I added a label to the front and added a coat of Mod Podge over the whole thing - this gives it a little more strength and will keep the papers from tearing.

So, that's it. To use it, I just always add my soups to the back and take from the front, that way they are properly rotated. And, the best thing, I don't have to stack my soups anymore. Plus, each soup flavor is kept together which means no more hunting through my pantry for the flavor needed. I can have a box for chicken noodle, cream of chicken, corn, peas, whatever... And, I can make as many as I need and my cupboard is organized.
Hey There. One of my readers told me about this post. I'm flattered that you like my idea enough to share it but copying it word for word and using my photos without permission, well, probably not the best way to share an idea. I did noticed that you mentioned my name at the top but I'd appreciate it if you'd include a link to my site instead. To the first time visitor, it looks like this was your idea, your creation, and your words. Sharing in blogland is fun but it's always a good idea to send readers to the original site instead of copying it directly. Anyway, I'm happy you liked the idea, I hope it is serving you well. Amy from www.thenshemade.com
ReplyDeletesince i am having to choose between buying the really neat food storage units i would love to have.. and the food to put on them... i am always happy to find one i can do frugally.
ReplyDeletesince i have a bunch of fridge boxes and a LOT of craft paper, this one is perfect!
thanks!